
< Return to Construction Index
I kept having this idea in the back of my mind that it would be cool to build a cocktail that was even MORE portable than the standard drum.
Since a Cocktail Drum is basicaly one tall tube, the biggest space problem is the length of the tube. So, the obvious solution is to compress the tube during travel. Since CocktailDrums already come in a variety of diameters I thought, why not make a telescoping drum with a smaller diameter snare portion sliding into a larger diameter bass portion.
So, with that in mind, and not wanting to spend too much money I set about acquiring 2 similar toms with diameters 1 inch apart.
I found what I was looking for on eBay, 2 concert toms, 13" & 14". Used concert toms are ideal since they already have the lug casings, lugs, and rims. Also, since they do not have a second head, there are no additional holes in the drums where they meet. Unless you are going to re-cover the drums, this would be asthetically unattractive.
So I got my parts together:
Step 1
The first step was to check out the drums.

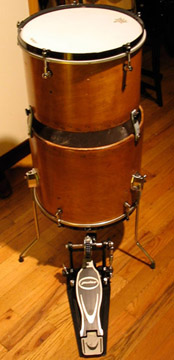
The drums are 12" x 14" and 9" x 13". The taller 14" drum actually helps the height of the assembled system (23"). If I had a 10" x 14", which is more standard, The entire assembly would be around 21" tall. A small difference but deppending on your height, it can make a big difference!

Checking out the drums nested together, I found that the height was just a pit too much. 18 inchesor so. So I replaced the Lug casings with these single bolt versions...
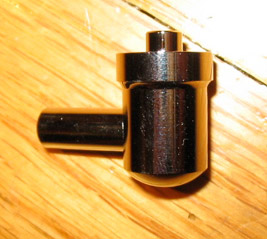
This got the nested drums down to around 15.5 inches!

Next, how to attach the drums? In order to keep it simple and inexpensive I decided on a system by which I bolt stiff yet flexible straps to the bottom drum. The straps extend up beyond the rim of the drum. The top portion of the strap has a hole in it. A finger tightening bolt passes through the strap and into a threaded brass insert in the top drum's shell.


To make the straps I got some nylon sliders that you put under furniture...

Cut them to length and add holes...

Drill holes on the top edge of the bottom drum...

and bolt them down!

Next add some leg mounting brackets. I already had some ludwig brackets laying around.

Now to add the threaded inserts into the top drum! Make sure that your holes line up between the bottom drum and the top drum. Drill them out and thread the insert into the shell.

Once it is inserted, it will be flush with the drum.

Now you can use the thumb screws to attach the two drums together

Finally, to build the snare. Take the Gibraltar tone control and remove the felt pad. Also cut the snare wires in half!

Drill a small hole in the metal plate of the snare and use a sheet metal screw to attach the two items.

Viola!

Now just mount the tone control as you would on any drum!
Use with the modified Pulse Pedal (See my other article)

Summary
Overall the drum works well. It fits nicely (and snugley) in a 14 x 14 fiber case for travel (no oversize charges!) I have not gotten the snare sounding the way I want it yet. It is still a little tight sounding. The bass drum sounds very punchy with a bit of muffling. The straps that I use are also a little bit too flexible so the position of the drum does shift a bit. I will try and come up with a more stable solution.
One pitfall I ran into was that the drums I purchased are 5 lug drums. They also have flat metal hoops with hooked lug brackets (similar to a bass drum). This arrangement does not allow for the subtlety of tuning that I want plus it is hard to clamp cymbal/percussion holders tot he rim. Since the drums are 5 lug, I cannot replace the hoops very easily. I will probably modify the drums to be 6 lug drums and replace the hoops with standard drum hoops.
Overall though I would say that this could be a very workable solution for someone needing a minimal setup in a very compact travel arrangement!
This is an ongoing project so I will hopefully put occassional updates here as time goes by.
- John