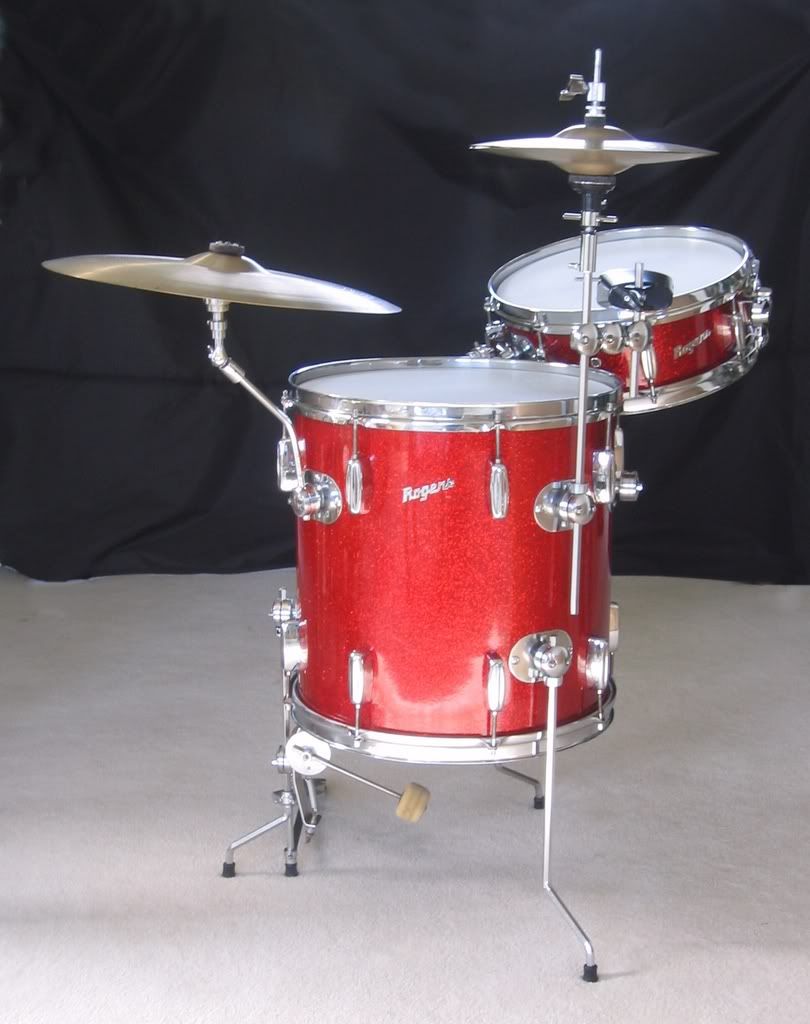
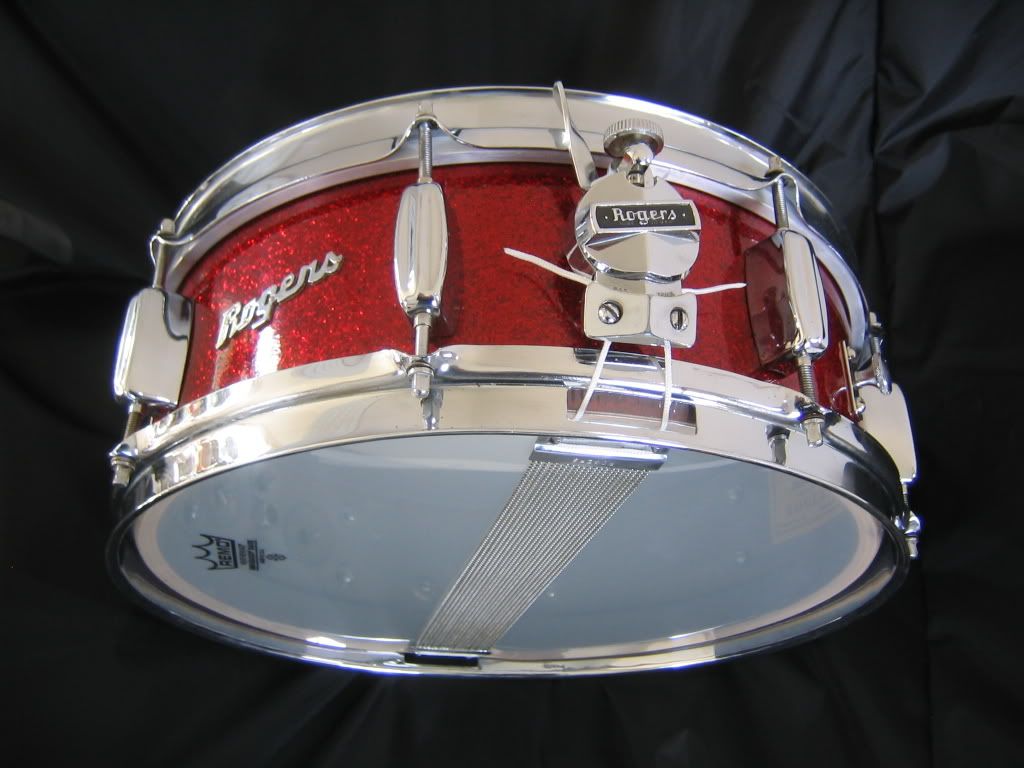
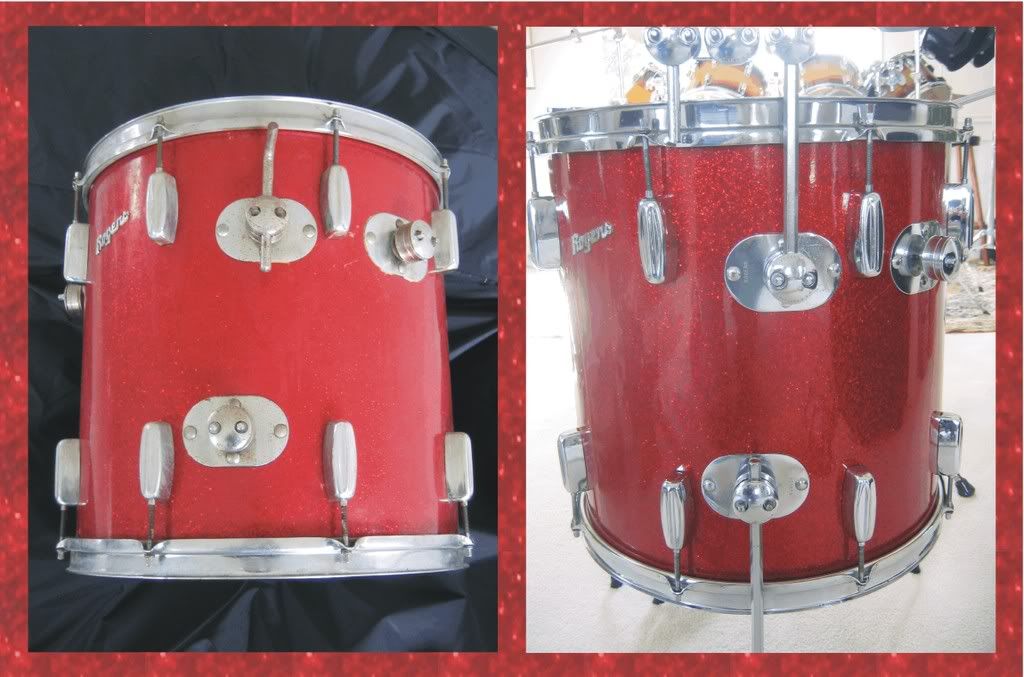
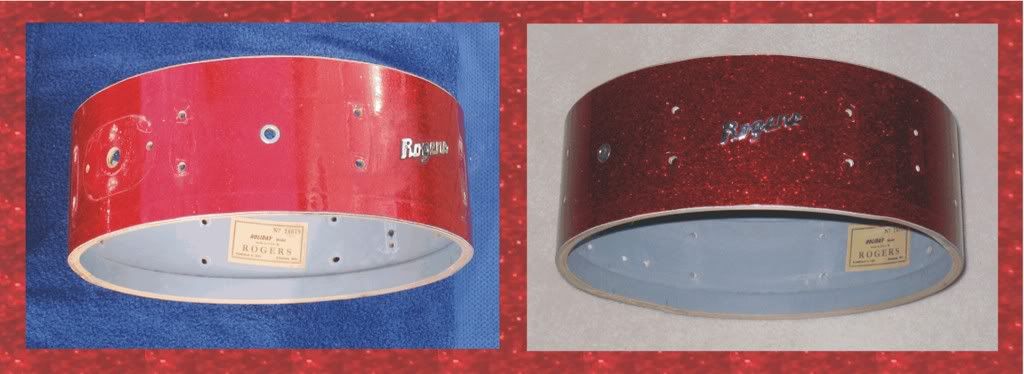
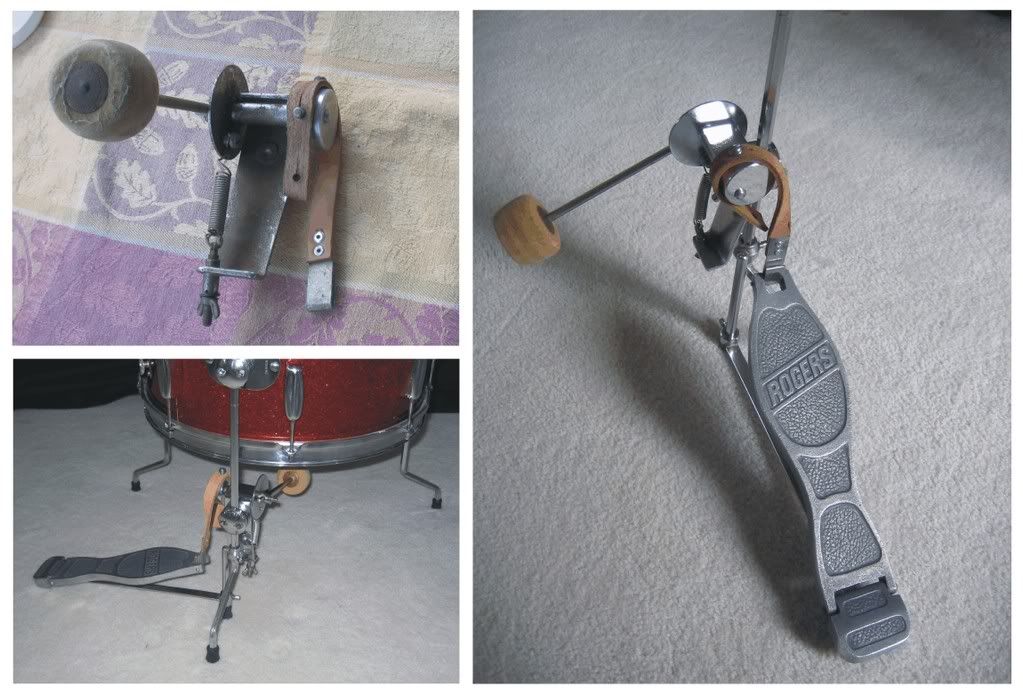
Found this in February and spent the last couple of months restoring it. It had been sitting in the original owner's attic for 40 years and was covered in baked-on dirt and surface rust. Most of the bread & butter lugs were cracked, and I found a way to rebuild them so they are back in working order.
The Rogers Upbeat pedal surprises me with it's speedy and sensitive action. The Holiday model snare and floor tom have that classic sound generated by the five ply shells with re-rings and rounded bearing edges. Way cool.
For kicks, I'm trying the Gibralter adjustable closed hats attachment in lieu of hauling around a hi hat stand. The idea is portability. Everything here, including throne, is tote-able in three bags and a backpack that I can handle in one load!
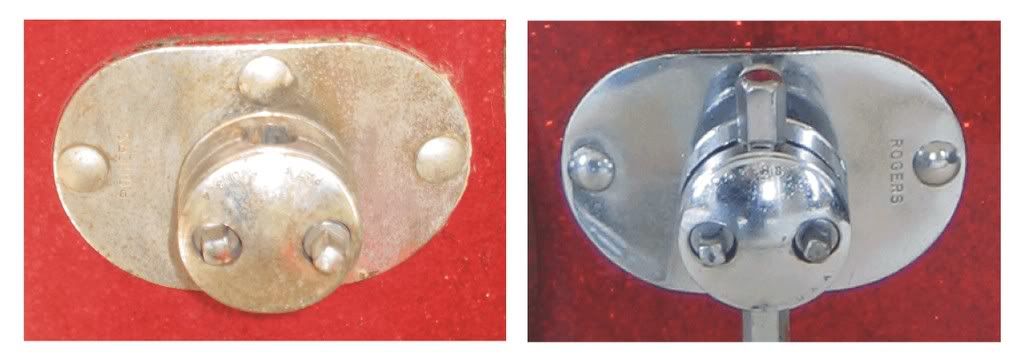
The floor tom was originally drilled and fitted with a fourth upper Swiv-o-Matic knobby (visible in the first pic) to accomodate a mounted tom, which would convert this from an Astoria into a Parklane outfit. This week, I found the correct additional 90 degree Swivo arm and also a matching 12" tom, so more pictures when I get 'em.
I used some automotive cleaning and restoring supplies to bring back the chrome and red sparkle shine.
Finally! A Rogers Astoria
Thanks, Robertm. Yes, I do play them, and that's the idea in my book. The drums I collect, I grab to play. I really like vintage Rogers--something about the look, the quality, the style, the smell, and of course the sound. With this outfit, I play in a loosely organized blues group, and practice with like-minded acoustic players. I use mostly brushes on them, but this baby really thumps if you want it too, as the drums are the real thing, ie, no corners cut or sacirifices in size and shape.
i will be dragging them to the perfect venue this summer, a boys camp for men called the Bohemian Grove. I got an oversized handtruck, and the nature of the setup is that the drums can be picked up in whole (pedal included), placed on the cart, and pushed around about 1.5 ,miles of winding roads filled with inividual camps of music makers. There is no setup time involved. just cart 'em in and cart' em out. Yeah!
Great job on the restoration TommyKat!
Of all the kits out there, the Astoria is the one I have always wanted. Congratulations on a great find.
Can you tell us more about how you repaired the cracked lug casings? I remember hearing about a guy who pours molten metal into the back to reinforce them...
Thanks for the photos and stories!
- John
John--molten metal! Now that's the way to do it. Unfortunately, I don't have the tools or wherewithall for that.
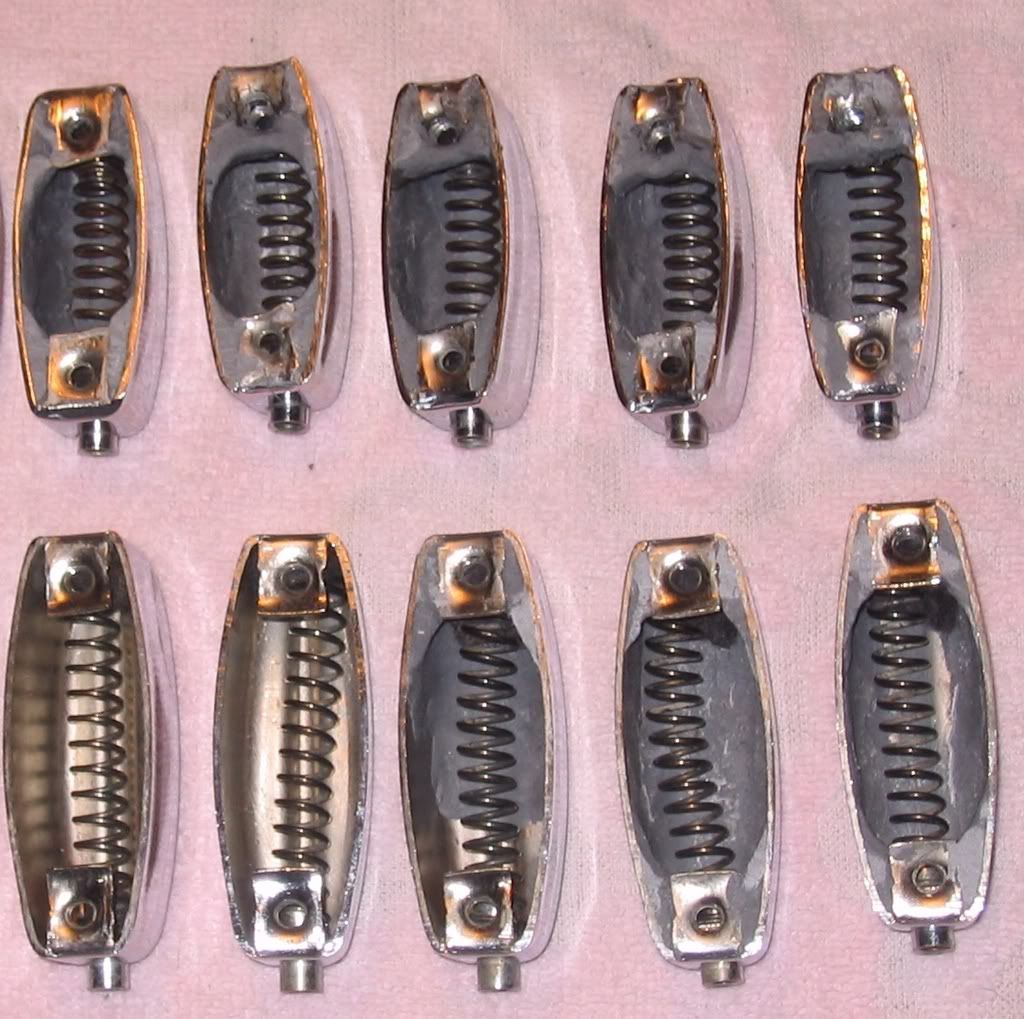
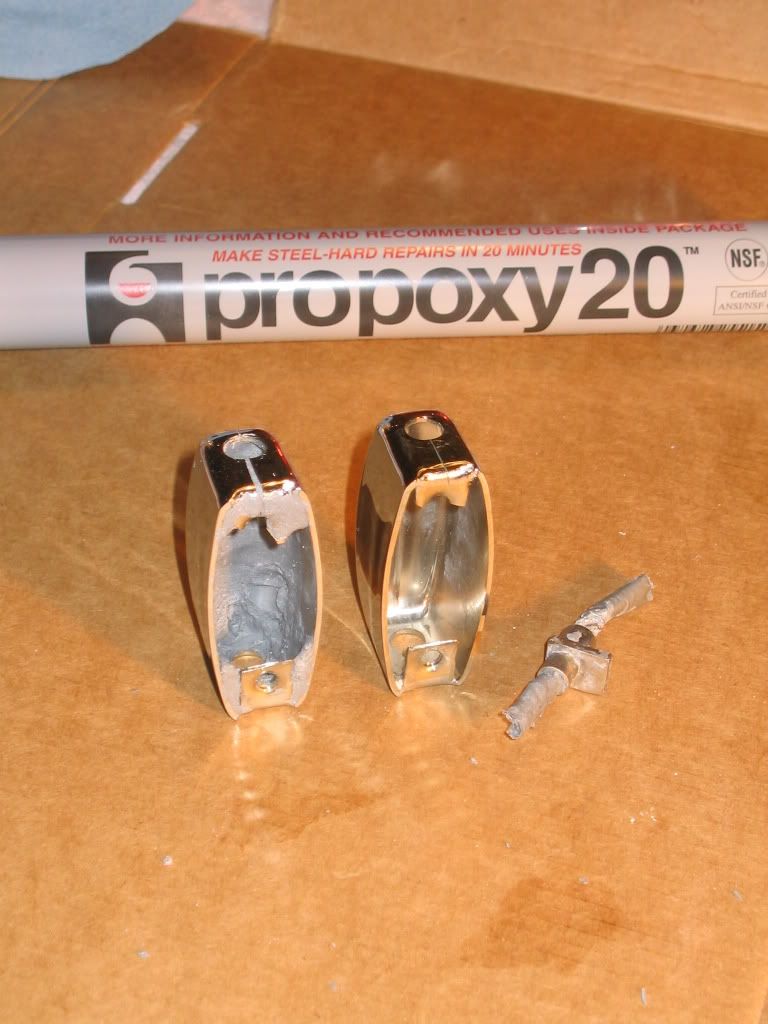
But I did do something similar. The process is long and arduous but worth the effort. Lugs with broken tabs will work, as long as at least half the tab is in place. It's a three step process and involves filling the lugs with metal epoxy putty, and using an extra lug nut as a stenciling or embossing tool. You have to be sure that the lug nut fits in place after the putty dries.
For lugs with broken tabs, you'll need 5/8" x 24 #10 machine screws and a matching nut to replace the 1/2" screws. After you finish step one above, use JB Weld to fasten the nut in place above the broken tab. Use a screw to align everything properly.
In step three you use more epoxy putty to seal in the nut, and also reinforce the tabs. Between all steps, you want to check that the lug nuts and springs assemble properly.
When you're done, the lug looks pretty ugly from the inside, but, of course, nobody ever sees this. From the outside, it's nearly impossible to see the old cracks. I believe that the lugs are stronger this way than as factory originals. I even reinforced the good lugs prior to rebuilding the drums. I hesitated at this point, but thought, screw it, I want to play these babies, and I don't want a lug snapping off during a show.
I took extensive photos and I'm preparing instructions for the gang on the Rogers Owners Forum.
http://com2.runboard.com/brogersownersforum
I'll post a link to the PDF in the cocktail forum, too. In the meantime, here are some samples of the finished product:
And here's the stencil at the right. Note that the lug on the left shows the process after step 1, and it is pretty nastily cracked:
by the way, John, you have done an exceptional job here. I really like this forum, and I've enjoyed your music, too. At my age, the acoustic cocktail sound is something I really enjoy. Where it's at is playing at a party where guests can chat in the background without having to go outside...but would rather listen to the music.